I'm currently casting up new stocks of my resin terrain, please contact me via my terrain for sale page
Saturday, 19 December 2020
Saturday, 19 September 2020
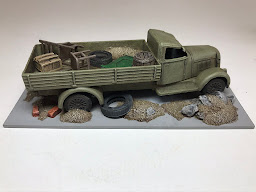
28mm street junk barricades
Here’s a few more street junk barricades I made recently. Based on 2mm MDF (120mm x 60mm) they are littered with all manner of items from my bits boxes. The vehicle are die cast metal, boxes and barrels are resin cast from my own designs, plastic dolls house furniture, and parts from other modelling items. I hope you like the pictures....
WIP pictures show the variety of modelling items used..
Primed and ready for paint..
Finished pictures...

Now in Ebay store .......
Wednesday, 2 September 2020
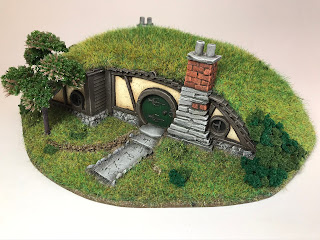
28mm Converted Forgeworld Hobbit Holes
Here's a couple more Hobbit Holes i made from Forgeworld resin fronts. The doors are very slightly changed , but the conversions mostly consisted of breaking up the flat fronts with a chimney or right angled wall. I really enjoyed making these, i think are probably my favourites of all the hobbit holes I've made to date. I hope you like the pictures...
Saturday, 1 August 2020
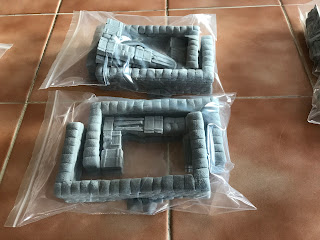
28mm Urban/Post Apocalyptic barricades
I recently made up some Urban/Post Apocalyptic Barricades. Scratch built from various styrene sheets, styrene 'I' beams, and various other corrugated materials, although I tried to use different sizes of corrugated materials to add some variation. The boxes, tyres, sacks and barrels are resin casts items, pallets are 3D printed. Based on 2mm MDF with all pigments sealed for durability, they were really enjoyable to make. I hope you like the pictures....
First set, front view..
First set, back view..
Second set, front view..
Second set back view..
Third set, front view..
Third set, back view..
Fourth set, front view..
Fourth set, back view..
Friday, 24 July 2020
28mm Scouring of the Shire, Halfling Burrows, Halfling homes
Here’s a couple more pieces of terrain I’ve been working on recently. Two more Halfling Burrows from Terrain at Model Earth
Here they are before i set to work on them..
The first was a relatively easy conversion,
The right hand side was cut and filed to fit around one of my resin cast chimneys.
then a simple cut along the left upright timber and a piece of Wills plasticard to bring out the front, with a small section of stone to recreate the lower stone work
Here is the front cut and ready for glueing up
And viola here is the finished piece..
The second was a little more ambitious...
I wanted to make a porch and a log store, so i started with the most simplest of cuts to make the log store. A nice straight cut down the right vertical timber and a bit of Wills plasticard.
This was fitted ontop of a small offcut of one of my resin chimneys to give a stone step effect. A small piece of balsa was then added to recreate a vertical timber
I then set about creating the porch. I found a 1/48th scale Rustic porch at Petite Properties. A nice little kit that would be perfect with a little bit of cutting and fettleing.
It comes with a set of instructions, but being typically male, i ignored those and proceeded with the build..
I used only three parts of the kit, the front frame and two of the roof timber sections. I had to use a couple of match sticks to bring the porch off the resin front to avoid the roof shingles, and used a bit of blue-tac to help eye everything up
I cut one of my resin log piles in half to give me a starting point of how far out to build the log store...
and set about creating a little nook out of some more Wills plasticard Lime sheets. I used an offcut from the porch kit to give a bit of roof detail over the log store, and a bit of Wills planking for the porch roof
Some strips of plasticard finished off the roof shingles above the log store to give me this.. In this picture you can see a planter box under the window, bit i omitted this on the finished piece. A bit of stone effect plasticard was used for the floor paving
Here are a few finished pictures of both these completed pieces.
The windows, chimneys, boxes and barrels are from my own resin cast pieces, along with a few small bricks from plaster. A water jug from a dolls house furniture kit completes the lived in effect
I hope you like the pictures, I'm really quite pleased with how they came out....
Subscribe to:
Posts (Atom)


