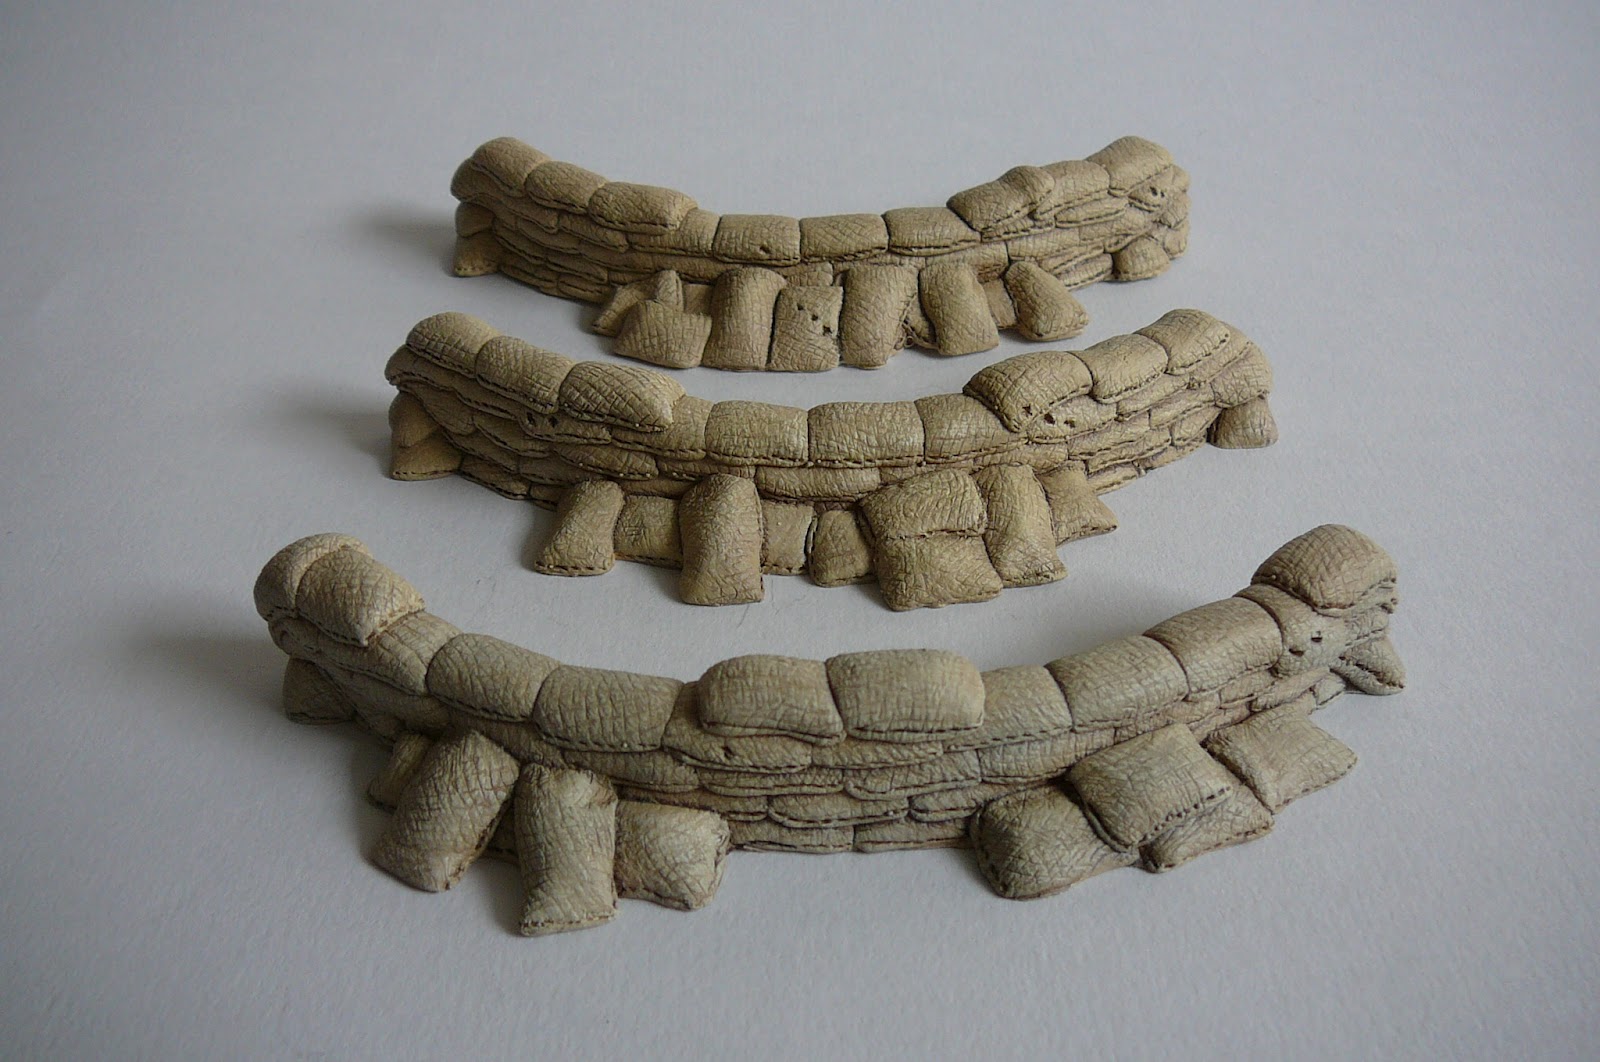
They're cast in resin and available direct from me via my Terrain for sale page for £6.49 + p&p
Monday, 14 May 2012
28mm Circular Sandbag Barricades
Its been a busy weekend and with the Redoubt, this is the second of my pieces i've managed to get finished. I've scuplted them to match up with my other sandbag sections, and are approx 150mm in linear length. They measure 21mm at the highest point, and 18mm at the slightly lower middle point for a heavy weapon or kneeling figure to fire through.
Sunday, 13 May 2012
28mm Sandbag, Mealie Bag Redoubt - Finished....
Finally i managed to get my latest piece finished this weekend. I'm really pleased with how its turned out, and also its versatility as well. As a full redoubt it will come as a 4 piece kit, two U shaped sandbag pieces,and 2 U shaped firing step pieces. Nothing needs gluing together as it can be used perfectly with just a paint job.
It can also be purchased as half a redoubt in just the two sections, and also with or without a firing step. It measures 160mm by 80mm externally, and 120mm x 60mm internally, with the height at 32mm.The firing step is 10mm high. The picture shows the models inside on the firing step, and the ones in front at normal game table height. As with all my other pieces, i've tried to add as much detail as possible without over doing things. I think the close up shots give a good idea of how it looks with GW 28mm figures.
Its cast in resin and available direct from me via my Terrain for sale page at £13.49 + p&p.
Sunday, 6 May 2012
28mm Sandbag Redoubt - Moulds ready for the castings
This is just a quick posting, the moulds are ready and the first castings will be poured tommorrow.
With a bit of luck I should some pictures of the painted castings in the next few days.
While i was at it, i've knocked up some circular sandbag barricades,and poured a mould so they'll be cast as well tommorrow
With a bit of luck I should some pictures of the painted castings in the next few days.
Sunday, 29 April 2012
28mm Sandbag Redoubt - ready for a mould?
I've been working on this over the weekend, and think i've taken the sculpting as far as a i can. I'm pretty happy with the result, its a versatile piece, and could be used in many different ways. It'll be cast as a 4 piece kit, two sandbag U sections, and two firing step U sections, to make up a completed redoubt.
It measures 160mm by 80mm externally, and 120mm x 60mm internally, with the height at 32mm.The firing step is 10mm high. The pictures show it with 28mm figures; the models inside are on the firing step, and the ones in front at normal game table height.
I thought a single U section could also be used against a wall to make a smaller redoubt, and the firing step can be combined with my single biscuit boxes or sandbags, to make a small barricade.
I'll probably start making a mould at the end of the week, so you're welcome to post a comment for anything that needs to be changed.....
It measures 160mm by 80mm externally, and 120mm x 60mm internally, with the height at 32mm.The firing step is 10mm high. The pictures show it with 28mm figures; the models inside are on the firing step, and the ones in front at normal game table height.
I thought a single U section could also be used against a wall to make a smaller redoubt, and the firing step can be combined with my single biscuit boxes or sandbags, to make a small barricade.
I'll probably start making a mould at the end of the week, so you're welcome to post a comment for anything that needs to be changed.....
Saturday, 28 April 2012
28mm Sandbag Redoubt
A couple of fellow gamers have asked me about making a sandbag redoubt. I'd planned it to be cast in two 'U' shaped sections, with a seperate firing step. It still needs to be higher but here's a few quick pictures.
Wednesday, 11 April 2012
28mm Resin Barn Building Finished
I've finished painting the barn. I wanted an old weathered finish, so i primarily used grey colours on top of a black base coat. I'm happy with the look, and the planking has turned out well. I hope you agree...
The roof came out ok but it looked to 'new', so i added some new strips of 'tar paper' using masking tape. I allowed it to wrinkle when putting it on, which i think adds a little character.
The roof also lifts off in one piece, keeping it safer, and the struts add a bit of strength to keep it from breaking.
The interior has more of a barn feel, with 2 sectioned of areas for livestock, a random scattering of hay, a couple of my resin boxes, and water buckets courtesy of GW.
Unfortunately i dont have any western miniatures to picture with it yet, but when i do I'll post some pictures up.
Friday, 6 April 2012
28mm Resin Barn Building - Part 5
I've gone and been a bit eager the put the barn together without any progress pictures. My apologies.... Anyway here it is constructed and waiting for the paint job.
You can see clearly the off white resin components with all the extra additions. I've cut out the apertures and framed them with balsa, and made up the dormer window in the roof. The roof is made from sandpaper stuck down on thin plastic with contact adhesive. This should give me a good surface to paint on and give a bit of detail. The roof lifts off in one piece and has support struts similiar to my other buildings.
A floor from hardboard (which will be sand textured) has strengthened up the whole building, but i've kept in within the barn walls so it can be put on a much larger board for gaming. It is intended for use as a livery stable so i've added a little detail inside, but not too much so not to impend on any figures moving around inside. The crates in the corner are from resin and poured from moulds i've made. I think the loading platform adds something different from other buildings of this nature.
All in all i'm happy with the way its turned out.
You can see clearly the off white resin components with all the extra additions. I've cut out the apertures and framed them with balsa, and made up the dormer window in the roof. The roof is made from sandpaper stuck down on thin plastic with contact adhesive. This should give me a good surface to paint on and give a bit of detail. The roof lifts off in one piece and has support struts similiar to my other buildings.
A floor from hardboard (which will be sand textured) has strengthened up the whole building, but i've kept in within the barn walls so it can be put on a much larger board for gaming. It is intended for use as a livery stable so i've added a little detail inside, but not too much so not to impend on any figures moving around inside. The crates in the corner are from resin and poured from moulds i've made. I think the loading platform adds something different from other buildings of this nature.
All in all i'm happy with the way its turned out.
Subscribe to:
Posts (Atom)